Development
If you'd like to contribute to Regal, here are some pointers to help get you started.
Before you start, the architecture guide provides a useful overview of how Regal works, so you might want to read that before diving into the code!
Prerequisites
The following tools are required to build, test and lint Regal:
- The latest version of Go
- The golangci-lint linter
- Node in order to run the following tools:
- The markdownlint linter
- dprint for checking JSON, YAML, etc
- The rq tool. This is used for automating and simplifying many of the tasks outlined in this document, and is (ab)used as a Rego-based replacement for Make in this project. Check out the do.rq file to see what that looks like, and for documentation on the available tasks. Note that this is a tool dependency of Regal and does not need to be installed separately.
Contributing New Rules
If you'd like to contribute a new built-in rule, the simplest way to get started is to run the regal new rule command.
This should be done from the top-level directory of the Regal repository, and would look something like this:
regal new rule --type builtin --category naming --name foo-bar-baz
This will create two files in bundle/regal/rules/naming (since naming was the category) — one for the rule and one
for testing it. The code here will be a pretty simple template, but contains all the required components for a built-in
rule. A good idea for learning more about what's needed is to take a look at some previous PRs adding new rules to
Regal.
Guiding principles for new built-in rules
- All rules should have succinct, descriptive names which are unique - even across categories
- A rule that misses a few cases is better than no rule at all, but it's good to document any known edge cases
- False positives should however always be avoided
- Add tests for as many cases as you can think of
- Any new rule should have an example violation added in
e2e/testada/violations/most_violations.rego - All the steps for building, testing and linting in this document should pass
If you're struggling with any of the above points, or you're unsure of what to do, no worries! Just say so in your PR,
or ask for advice in the #regal channel in the Styra Community Slack!
Rules Development Workflow
Linter rules use a JSON representation of the AST as input. Use the regal parse command pointed at any Rego
file to inspect its AST in this format. It is often more convenient to direct this output to a file, like
input.json to browse it in your favorite editor, e.g. regal parse policy.rego > input.json.
If you're using VS Code and the OPA VS Code extension, you may
use the Code Lens for Evaluation to directly
evaluate packages and rules using the input.json file as input, and see the result directly in your editor on the
line you clicked to evaluate.
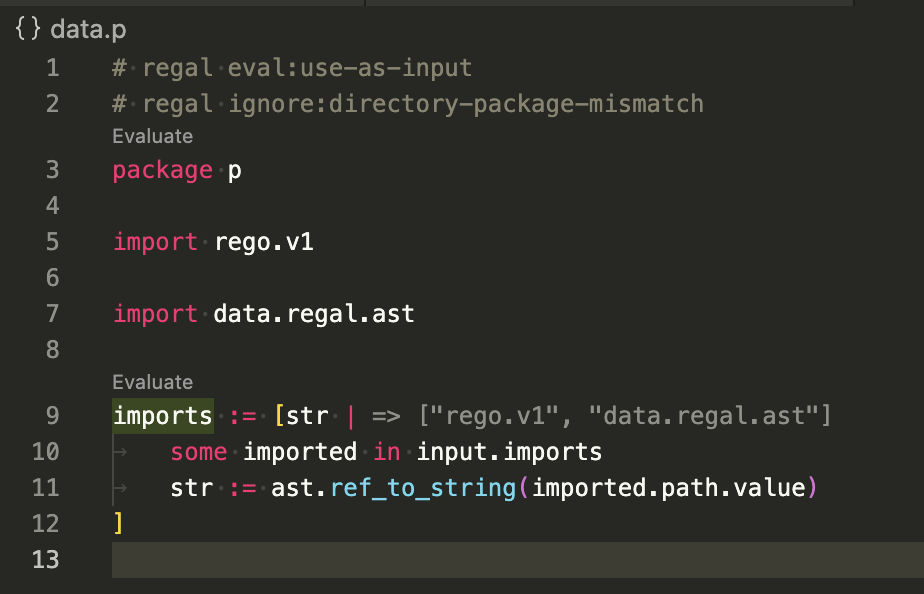
As another convenience, any .rego file where the first comment in the policy is # regal eval:use-as-input will have
the evaluation feature automatically use the AST of the file as input. This allows building queries against the AST of
the policy you're working on, providing an extremely fast feedback loop for developing new rules!
Building
Build the regal executable simply by running go build, or with rq installed, by running build/do.rq build.
Occasionally you may want to run the build/do.rq fetch script. This will
populate the data directory with any data necessary for linting (such as the built-in function metadata from OPA).
Testing
To run all the Rego unit tests, you can run the regal test command targeting the bundle directory:
regal test bundle
To run all tests — Go and Rego:
go test ./...
Or using rq:
build/do.rq test
E2E tests
End-to-End (E2E) tests assert the behavior of the regal binary called with certain configs, and test files.
They expect a regal binary either in the top-level directory, or pointed at by $REGAL_BIN, and can be run
locally via
go test -tags e2e ./e2e
Alternatively, using rq:
build/do.rq e2e
Linting
Regal uses golangci-lint with most linters enabled. In order to check your code, run:
golangci-lint run ./...
Note that for many issues reported, and in particular those related to style, it is often possible to run with the
--fix flag to have the issues automatically fixed:
golangci-lint run --fix ./...
In order to ensure consistent formatting in our markdown docs, we use the
markdownlint tool in CI. To run it yourself before submitting a PR,
install it (brew install markdownlint-cli) and run:
markdownlint --config docs/.markdownlint.yaml README.md docs/
Preparing a pull request
Using rq, run all the required steps with:
build/do.rq pr
This will run all the formatters, linters and tests. Make sure all of them pass before submitting your PR. If there's
anything you can't figure out, don't hesitate to ask for help in the #regal Slack channel (see Community below).
Documentation
The table in the Rules section of the README is generated with the following command:
go run main.go table --write-to-readme bundle
Wasm (Experimental)
Build with
GOOS=wasip1 GOARCH=wasm go build -o regal.wasm .
Run with wasmtime regal.wasm and the like:
$ curl https://wasmtime.dev/install.sh -sSf | bash
# ...
$ wasmtime --version
wasmtime-cli 13.0.0
$ wasmtime --dir $(pwd) regal -- lint bundle
90 files linted. No violations found.
Community
If you'd like to discuss Regal development or just talk about Regal in general, please join us in the #regal
channel in the Styra Community Slack!