Use Styra DAS with Terraform Cloud or Terraform Enterprise
To connect Styra DAS with your Terraform Cloud or Terraform Enterprise organization, Styra DAS needs to create a run task in your Terraform Cloud/Enterprise organization to allow for secure communication with Terraform Cloud/Enterprise. This run task can be associated with individual Terraform Cloud/Enterprise workspaces to allow Styra DAS to receive an API request from Terraform Cloud/Enterprise in the post-plan or pre-apply stages of a workspace run.
Integration with Terraform Enterprise run tasks is only available on Styra DAS Enterprise.
Generate a Terraform Cloud/Enterprise Organization API Token
Run tasks are managed at the Terraform Cloud/Enterprise organization level and require a user with organization owner permissions. You will need to provide Styra DAS with a temporary Terraform Cloud/Enterprise organization API token, which allows Styra DAS to create the run rask in your organization. The provided Terraform Cloud/Enterprise organization API token is only used for this one-time integration and will not be stored by Styra DAS.
Terraform Cloud/Enterprise organization API Tokens are a type of token intended for initial setup tasks within your organization. Organizations can have only one valid organization API token active at any one time and should rotate the token after each one-time use.
Refer to Terraform's Organization API Tokens documentation for additional details.
To generate the organization API token:
- Log in to the Terraform Cloud console at app.terraform.io or to your Terraform Enterprise console.
- Click Settings in the navigation bar.
- Click API Tokens from the left-hand menu.
- Click the Create an organization token button.
- Copy the organization token value for the next step. The token value will not be shown again if you navigate away in the Terraform Cloud/Enterprise console.
If an organization token has been previously generated, you will see a Regenerate token button instead of a create button. Ensure the existing token's use is no longer needed for other setup tasks/integrations, then click the regenerate button and the Yes, Regenerate Token in the confirmation modal.
Connect Styra DAS to Terraform Cloud/Enterprise
Styra DAS automates the integration process with Terraform Cloud/Enterprise by creating an organization-level run task and securing it with a private HMAC Key to validate run task API requests for your specific Styra DAS workspace.
To start the automated integration process:
-
In the Styra DAS UI, click on your workspace in the left-hand navigation menu under WORKSPACE. Go to your workspace's Settings >> Terraform Integration pane and enter in the following information:
-
Terraform Run Task Domain (optional): Styra DAS Enterprise users with Terraform Enterprise should enter their Terraform Enterprise domain (e.g.,
https://terraform.example.com). Terraform Cloud users should leave the field blank to default to the Terraform Cloud domain. -
Terraform Organization Name: Enter your Terraform Cloud/Enterprise organization name (case sensitive) as used in Terraform Cloud/Enterprise. You can find your organization name displayed in the top-left of the Terraform Cloud/Enterprise console, or refer to Terraform's Organization Settings documentation for details on how to find your organization name.
-
Terraform Organization API token: Enter your Terraform Cloud/Enterprise organization API Token generated in the section above. This token will only be used in this setup process and will not be saved by Styra DAS.
-
-
Click the Save changes button.
Once the integration has been successfully created, you should see the Terraform organization URL for your organization and the Terraform run-task URL for the run task created by Styra DAS.
To configure the run task integration with a non-public Terraform Enterprise domain, use the Styra DAS Relay Client. When using the Relay Client, set the Terraform Run Task Domain to http://relay-server:8080/v1/relay/<client-key>, where <client-key> is the Relay Client key configured during the Relay Client setup process (e.g., TERRAFORM_ENTERPRISE).
Add a Run Task to a Terraform Cloud/Enterprise Workspace
Once Styra DAS has created the run task at the Terraform Cloud/Enterprise organization level, you can associate the run task with Terraform Cloud/Enterprise workspaces. Refer to Terraform's Associating Run Tasks with a Workspace documentation for full details of this process. A summary of these steps is included below.
-
In Terraform Cloud/Enterprise, navigate to the desired workspace and click the workspace-level Settings >> Run Tasks.
-
Select the Styra DAS run task created by Styra DAS from the Available Run Tasks. The Styra DAS run task will be named in the format
styra-das-policy-check-<DAS_tenant>. -
Select either the "Post-plan" or "Pre-apply" option for the run stage. The best run stage option for the Styra DAS run task depends on your team's workflow. If your workflow often includes a delay between the plan and apply stages of a Terraform Cloud/Enterprise workspace run due to required review steps and/or your Terraform resource configurations rely on data sources which change often, the changes in a plan may be significant enough to result in new policy violations being introduced by the time the initial plan is approved. In this case, configuring the Styra DAS run task for the "Pre-apply" stage offers a final policy check on the plan just before the changes in the plan to cloud resources are executed.
-
Select the policy check's enforcement level ("mandatory" or "advisory"). A mandatory enforcement level (recommended) will prevent Terraform Cloud/Enterprise workspace runs with "enforce" policy evaluation failures from apply changes to cloud resources (Styra DAS "monitor" policy rules will not block workspace run completion).
-
Click the Create button.
To associate run tasks to workspaces in Terraform Cloud/Enterprise, your user requires workspace administrator permissions.
Associate a Styra DAS System with Terraform Cloud/Enterprise Workspaces
To define policies to evaluate on Terraform Cloud/Enterprise workspace runs, you associate a Styra DAS Terraform system and its policies with one or more Terraform Cloud/Enterprise workspaces. This mapping association is set in your Styra DAS workspace settings:
-
In your Styra DAS workspace's Terraform Cloud/Enterprise Integration settings, click the Add system mapping button and define the following:
- DAS Terraform system: From the dropdown, select a Terraform system in your Styra DAS account.
- Terraform Cloud/Enterprise workspaces: Enter the Terraform Cloud/Enterprise workspace ID for the workspace with the run task added in the section above. This field accepts multiple workspace IDs to allow you to map a Styra DAS Terraform system and its policies to multiple workspaces.
-
Press Enter after entering each workspace ID.
-
Click the Save changes button.
Once added, your Styra DAS Terraform system to Terraform Cloud/Enterprise workspace mappings are shown in this workspace settings pane as well as at the system level.
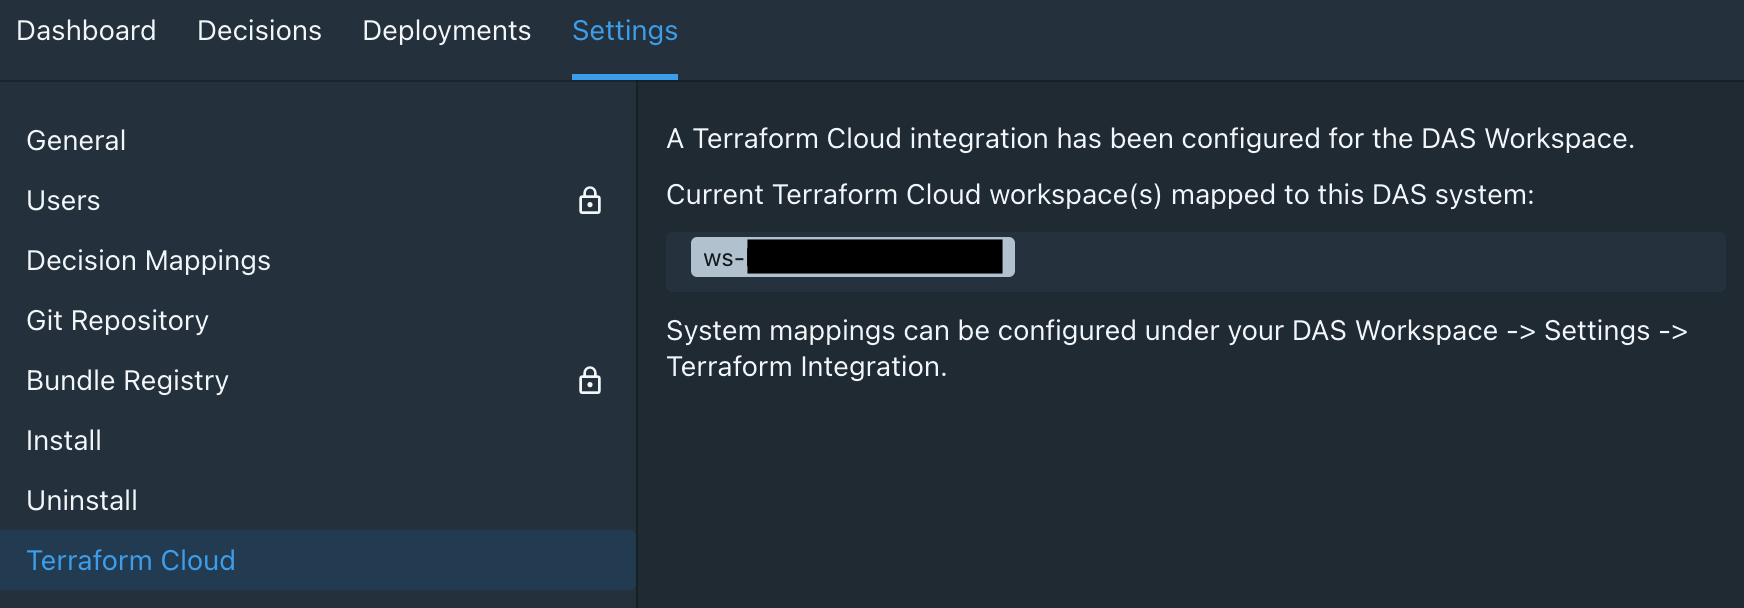
You can verify your Terraform system is mapped to the specified Terraform Cloud/Enterprise workspace(s) by navigating to your Terraform system and clicking on Settings >> Terraform Integration Settings. This pane displays a configuration message with the current status of any mappings of Terraform Cloud/Enterprise workspaces to this Styra DAS system.
 Figure 1 - Terraform Cloud System Mapping
If you need to change the system associated with a Terraform Cloud/Enterprise workspace, you must first delete the system mapping by clicking on the trash can 🗑 icon and then add a new system by clicking on the Add system mapping button.
Styra DAS Decision Log Mappings for Terraform Cloud/Enterprise Runs
If you are mapping multiple Terraform Cloud/Enterprise workspaces to a Styra DAS Terraform system, you can update the system's default decision mapping to display the Terraform Cloud/Enterprise workspace name and run ID in separate columns in the Decision Log to help you distinguish Styra DAS decisions between various workspaces and runs.
To update the default decision log mapping, follow the steps below.
-
In your Styra DAS Terraform system, click on Settings >> Decision Mappings.
-
Click on the existing "Default" mapping or a custom mapping you have already defined.
-
In the Columns section, add the following two column definitions:
Search key Path to value workspaceinput["styra-tfc-webhook"].workspace_namerun_idinput["styra-tfc-webhook"].run_id
Generate a Styra DAS Decision for a Terraform Cloud/Enterprise Run
Once you have your Styra DAS Terraform system (and its policies) and Terraform Cloud/Enterprise workspace mappings defined, trigger a workspace run via either the Terraform Cloud/Enterprise UI or via the Terraform CLI.
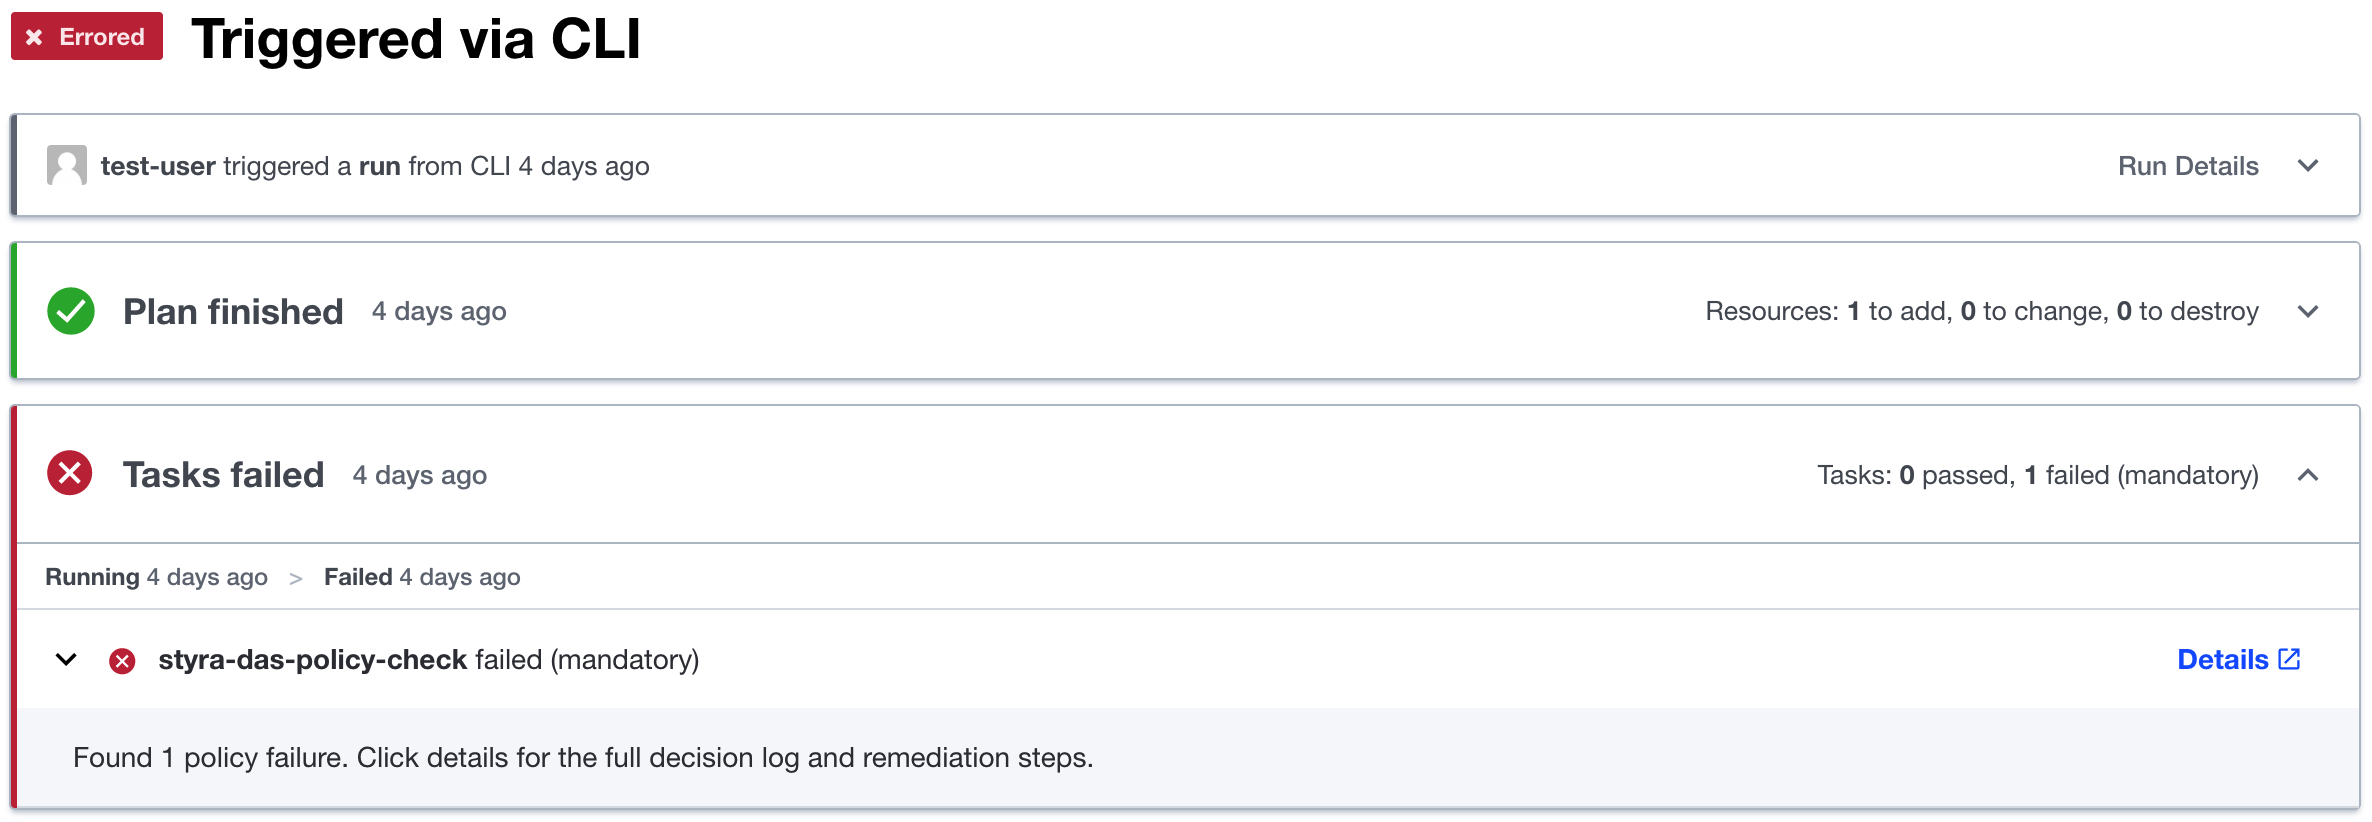
Once the plan phase of the run is complete, the Styra DAS run task will evaluate the plan against your Styra DAS Terraform system policies. The Styra DAS policy evaluation result summary will be displayed in the Terraform Cloud/Enterprise run details as well as in the Terraform CLI, if used.
 Figure 2 - Terraform Cloud Run Details
The Details link on the Styra DAS run task will navigate you directly to the associated policy decision in Styra DAS.
You must have Terraform CLI version 1.1.9 or higher to receive run task result details within the CLI.